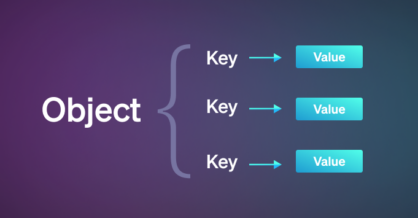
How to Get an Object’s Keys and Values in JavaScript
In JavaScript, getting the keys and values that comprise an object is very easy. You can retrieve each object’s keys, values, or both combined into an

There are many types of input fields, and while getting their value is done similarly in each case, it requires some thought to do well.
Here is a basic example. It creates a text input field, then prints the contents to the console
HTML
<input type="text" placeholder="Enter text" onblur="getVal()">
JavaScript
function getVal() {
  const val = document.querySelector('input').value;
  console.log(val);
}
The input’s value will be printed to the console when the getVal() function is invoked.
Every input can receive an attribute that establishes a “call to action” – in other words, an event that triggers the execution of a function.
In the above example, we use the DOM event onblur to make calls to our event handler function.
Each type of input will require different events to trigger the handler function – that’s the part of retrieving input from the user that requires some thinking. On top of this, multiple events can be used with the same input. Understanding when these events are triggered, and how they interact with your input field, is the key to getting your event handlers working properly.
The onblur event triggers the getVal() function once the field loses focus (i.e. the user navigates away from the field).
Not every event suits every purpose. If, for example, you are working with an input that supports a search mechanism, and the event handler should be triggered each time the data changes, you will want to use the oninput event. With oninput, every character the user types (or deletes) will trigger the getVal() function, causing the field’s contents to be printed to the console. For example, if you were typing the word “dog”, you would see “d”, then “do”, then finally “dog” in the console output.
Working with event handlers properly requires effort at both the DOM level and at the Script level.
1. DOM level:
a. Make sure that the DOM element has an event attribute that triggers your event handler function.
b. Make sure that the DOM event you’ve chosen is the right choice for your input.
Syntax
To specify your event handler, add it as an attribute on the element using the following format:
DOMevent=”funcName()”
2. Script level:
At the script level, simply define your handler function:
function funcName() {
const val = findHTMLelement.value
Make use of the val
}
Find an HTML element
Event handlers often require that you find the HTML element being modified as the first step.
There are several ways to do so – mainly by using different DOM queries.
In the text input field example above, we used document.querySelector(‘input’) to find the input field being modified. This query returns the first input. If there are several input fields, this simple query will not work well – you’ll want to use a more specific DOM query in that case.
For most input types, the .value attribute will prove useful in getting the field’s value. Some inputs, however, require different attributes – for example, the checkbox input type does not use the .value attribute (more on this below).
Input type
Every input has a type. This type determines what the input element looks like when it is rendered on the page, If the input is of type text, a text field is shown on the browser. If the input is of type checkbox, a checkbox appears.
As mentioned above, retrieving the value of a checkbox field is slightly different from other input field types. Take the following example, which creates a checkbox in the browser window and assigns a handler to the DOM event onchange:
HTML
<input type="checkbox" onchange="getChecked()" id='check1'>
JavaScript
function getChecked() {
  const checkBox = document.getElementById('check1').checked;
  if (checkBox === true) {
    console.log(true);
    } else {
      console.log(false);
  }
}
In the above example the triggering DOM event is onchange. This means that whenever a change is made to the input, the handler function getChecked is called. This is a frequently used event trigger for input fields.
The DOM query was done using document.getElementById(‘_id_‘), which queries the document for elements with a matching id attribute. An element’s Id is unique. Finding elements by Id ensures that you will only get a single element back. Using ids is costly, though – it is better to search by classname.
To search by class name, use document.getElementsByClassName(“_className_”)[idx]. This will retrieve all elements that have the associated classname value, so it is important to ensure that only one element with the requested class name exists. The getElementsByClassName() selector returns an array, which means you need to pull the input field from the returned array – hence the [idx].
To retrieve the value of a checkbox, use the checked attribute. The checked attribute returns true or false based on the contents of the input field.
Related Articles:
JavaScript – How to Set an HTML Element’s Class
In JavaScript, getting the keys and values that comprise an object is very easy. You can retrieve each object’s keys, values, or both combined into an

The Assignment operator is used to assign a value to a variable. Assignment (=) The assignment operator simply assigns the value of the right operand to

The for…in statement is used to loop through an object’s properties. Basic for…in loop example The following code demonstrates a basic example using the for…in statement